There are so many ways to transform a party and create décor on a budget. These DIY projects we gathered for you will help boost your parties and events by making them unique from the rest with out spending a lot of dough.
Photo booth props are a must have! If you are having a specific theme for your party go for it and tailor some DIY props to match it! There are so many tutorials you can find online and they are fairly simple to put together.

We found these delightful Gatsby themed 1920’s accessories online and they are even FREE printables! Go to your local craft store and you will find these little craft sticks readily available and cheap to stick them too. Just get out your scissors, hot glue gun, your craft sticks, and get printing.
It’s a straightforward and cheap way to upgrade your photo booth rental while making it completely unique to your motif.

Ok, now what could be better than a re-usable plastic garland? Once you have created your garland you can use it endless times by using a dry-erase marker for your sayings. Seriously this is so genius that we had to post the tutorial right here for you!

If you are thinking you want to make this, you should buy your plastic sheets online right away. If you have a larger art supply store in your area, you may be able to find them there. I am not sure if your local craft stores carry this so you might need to do a little checking.
You will need Plastic Craft Sheets (mine were 6? x 9? but any size will do as you cut them down anyway), a paper cutter, paints and paint brushes, string, a hole punch and a dry erase marker.
The plastic sheets come with an easy to remove coating on each side to keep them from getting scraped up. Leave the coating on (that is what is making them look blue in the pictures, the plastic sheets really are clear). Using a paper cutter, cut the sheets in to whatever size you want. Because my sheets were 6? x 9?, I first cut them in half at the 3? mark and then made cuts on each of those at the 4.5? mark. One sheet gave me 4 rectangle pieces.

Remove the protective backing from one side only. Choose what color paint you want to use for your banner and paint each rectangle as you see fit. I went with some fairly girly colors. I have two little boys and sometimes I need to infuse my life with pastels.
I was not careful or thorough with how I painted them. I like that some areas were a bit more transparent than others. Also because you left on the protective cover on the other side, you don’t have to be so concerned about how neatly you are painting them. Yeah!

Paint all of your rectangles and let them dry.
Peel off the protective layering from the other side.
Use a hole puncher and punch a hole in the two top corners.
String the plastic rectangles on to whatever string you have chosen to display your garland on. Make sure that all of the shiny sides of the rectangles are facing the same direction.

Hang your garland so that the rough, painted side is laying against the wall. The shiny side should be facing out as that is the side you will write on with the dry erase marker.
You can use the dry erase marker to write anything you want. And then erase it and write something else.
Wow! Thank you Sharon from Cupcakes and Cutlery! Visit her page for more of her wonderful inspiration. She says at the end of her tutorial that this garland would be awesome in a photo booth too and we could not agree more with her.

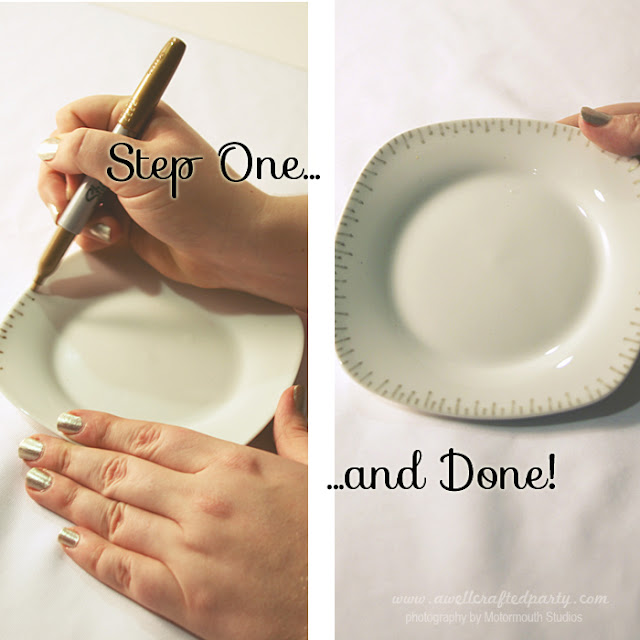
These custom appetizer plates we came across are a really nice touch to add to any spread. Whether you are hosting a holiday party or a backyard BBQ decorating some plain white plates or serving platters can really spruce things up. You can find plain plates at thrift stores for hardly any money. Then, you just take your sharpie and put whatever design you would like on the plates.
When the party is over you can either wash it off by letting it sit in dish soap filled water for about thirty minutes and it will then wash off. If you love your design you can cure them in an un-preheated oven for a half hour at 350. Turn the oven off and let sit in it until cool. Do not use them for 24 hours.
Photo Booth of the Stars loves a great party and these are some dazzling tips to make yours extra special and will fit into any budget. Cheers!